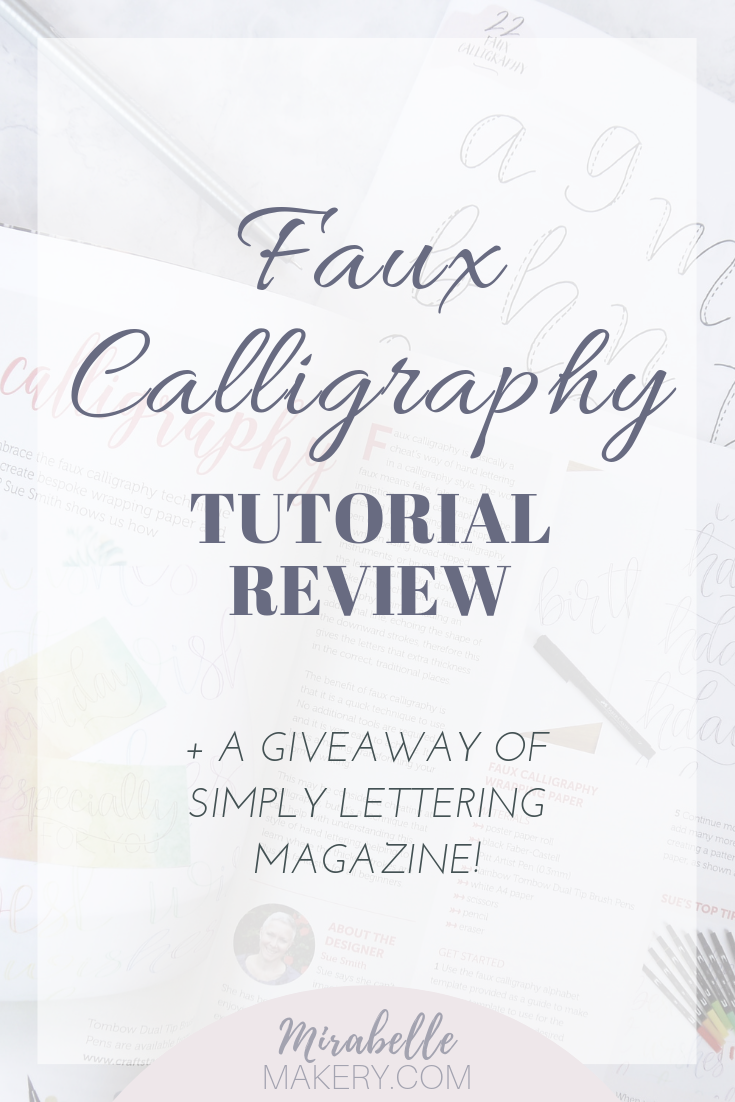
How to do Faux Calligraphy + a Giveaway!
A Simply Lettering tutorial review with your chance to win a copy of the *NEW* modern calligraphy magazine
*** COMPETITION IS NOW CLOSED ***
Disclaimer: This post may contain affiliate links, which means I may receive a commission if you click a link and purchase something that I have recommended. While clicking these links won't cost you any extra money, it helps keeps Le Petit Blog up and running. Please read my Disclaimer Policy for more information.
How exciting is this?! Issue 1 of Simply Lettering has just been released!
It’s been a long time coming for a hand lettering magazine to get on to the shelves, but it’s been worth the wait.
Since I discovered hand lettering - not even 3 years ago - it seemed like it was already a big thing (I was living under a rock btw) yet it hasn’t shown any signs of going away.
I’ve been indulging in it’s pages - including its 21 fun tutorials - and because I love it so much and completely recommend it I’ve got 2 copies to giveaway!
Read on to find out how you can enter the giveaway and even get started on a calligraphy project today.

How to enter the giveaway
For your chance to win a copy of Simply Lettering magazine all you need to do is these 3 things:
Head over to my Instagram account and leave a comment on the giveaway video
Follow me on Instagram
Follow Simply Lettering on Instagram
And if you’d like a bonus entry, once you’ve done the 3 things above you can leave a comment at the end of this blog post.
Full Terms and Conditions are at the end.
The competition closes at 11:59pm Saturday 27th July and 2 lucky winners will be announced on 28th July over on the original Instagram post.

In the meantime - lucky you - I’ve got a taster of just one of the inspiring projects packed into the magazine.
It’s so straight forward that I guarantee you’ll be able to follow along.
I was so tempted to get my dip pen and ink out - okay, they’re always out - but I wanted to show you something that you could do even if you only have a pencil or just a biro to hand - yes, really!
One of the great things about faux (French for ‘false’ or ‘fake’ but by no means is it cheating!) calligraphy is that it’s a brilliant way to get introduced to pointed pen calligraphy and understand how the letters of the alphabet are formed.
When I first began my modern calligraphy journey, faux calligraphy really helped me to grasp the concept of thick downstrokes and thin upstrokes which give the alphabet it’s unique look.
And when I started offering personalised calligraphy in my Etsy shop it was faux calligraphy with gel pens!
{Please don’t judge, everyone starts somewhere, but it should give you hope 😉}

My faux calligraphy alphabet sampler made with a gel pen from November 2017 before I discovered the dip pen
So, if you’re a beginner or you’re looking to try something new then you’re going to love faux calligraphy.
I love that you can take it anywhere with you too - and no mess - so when you’re only lucky enough to have those small snippets of time, 5 minutes here or 10 minutes there, you can just get on with it and begin to make some real progress with your hand lettering.
Faux calligraphy tutorial review
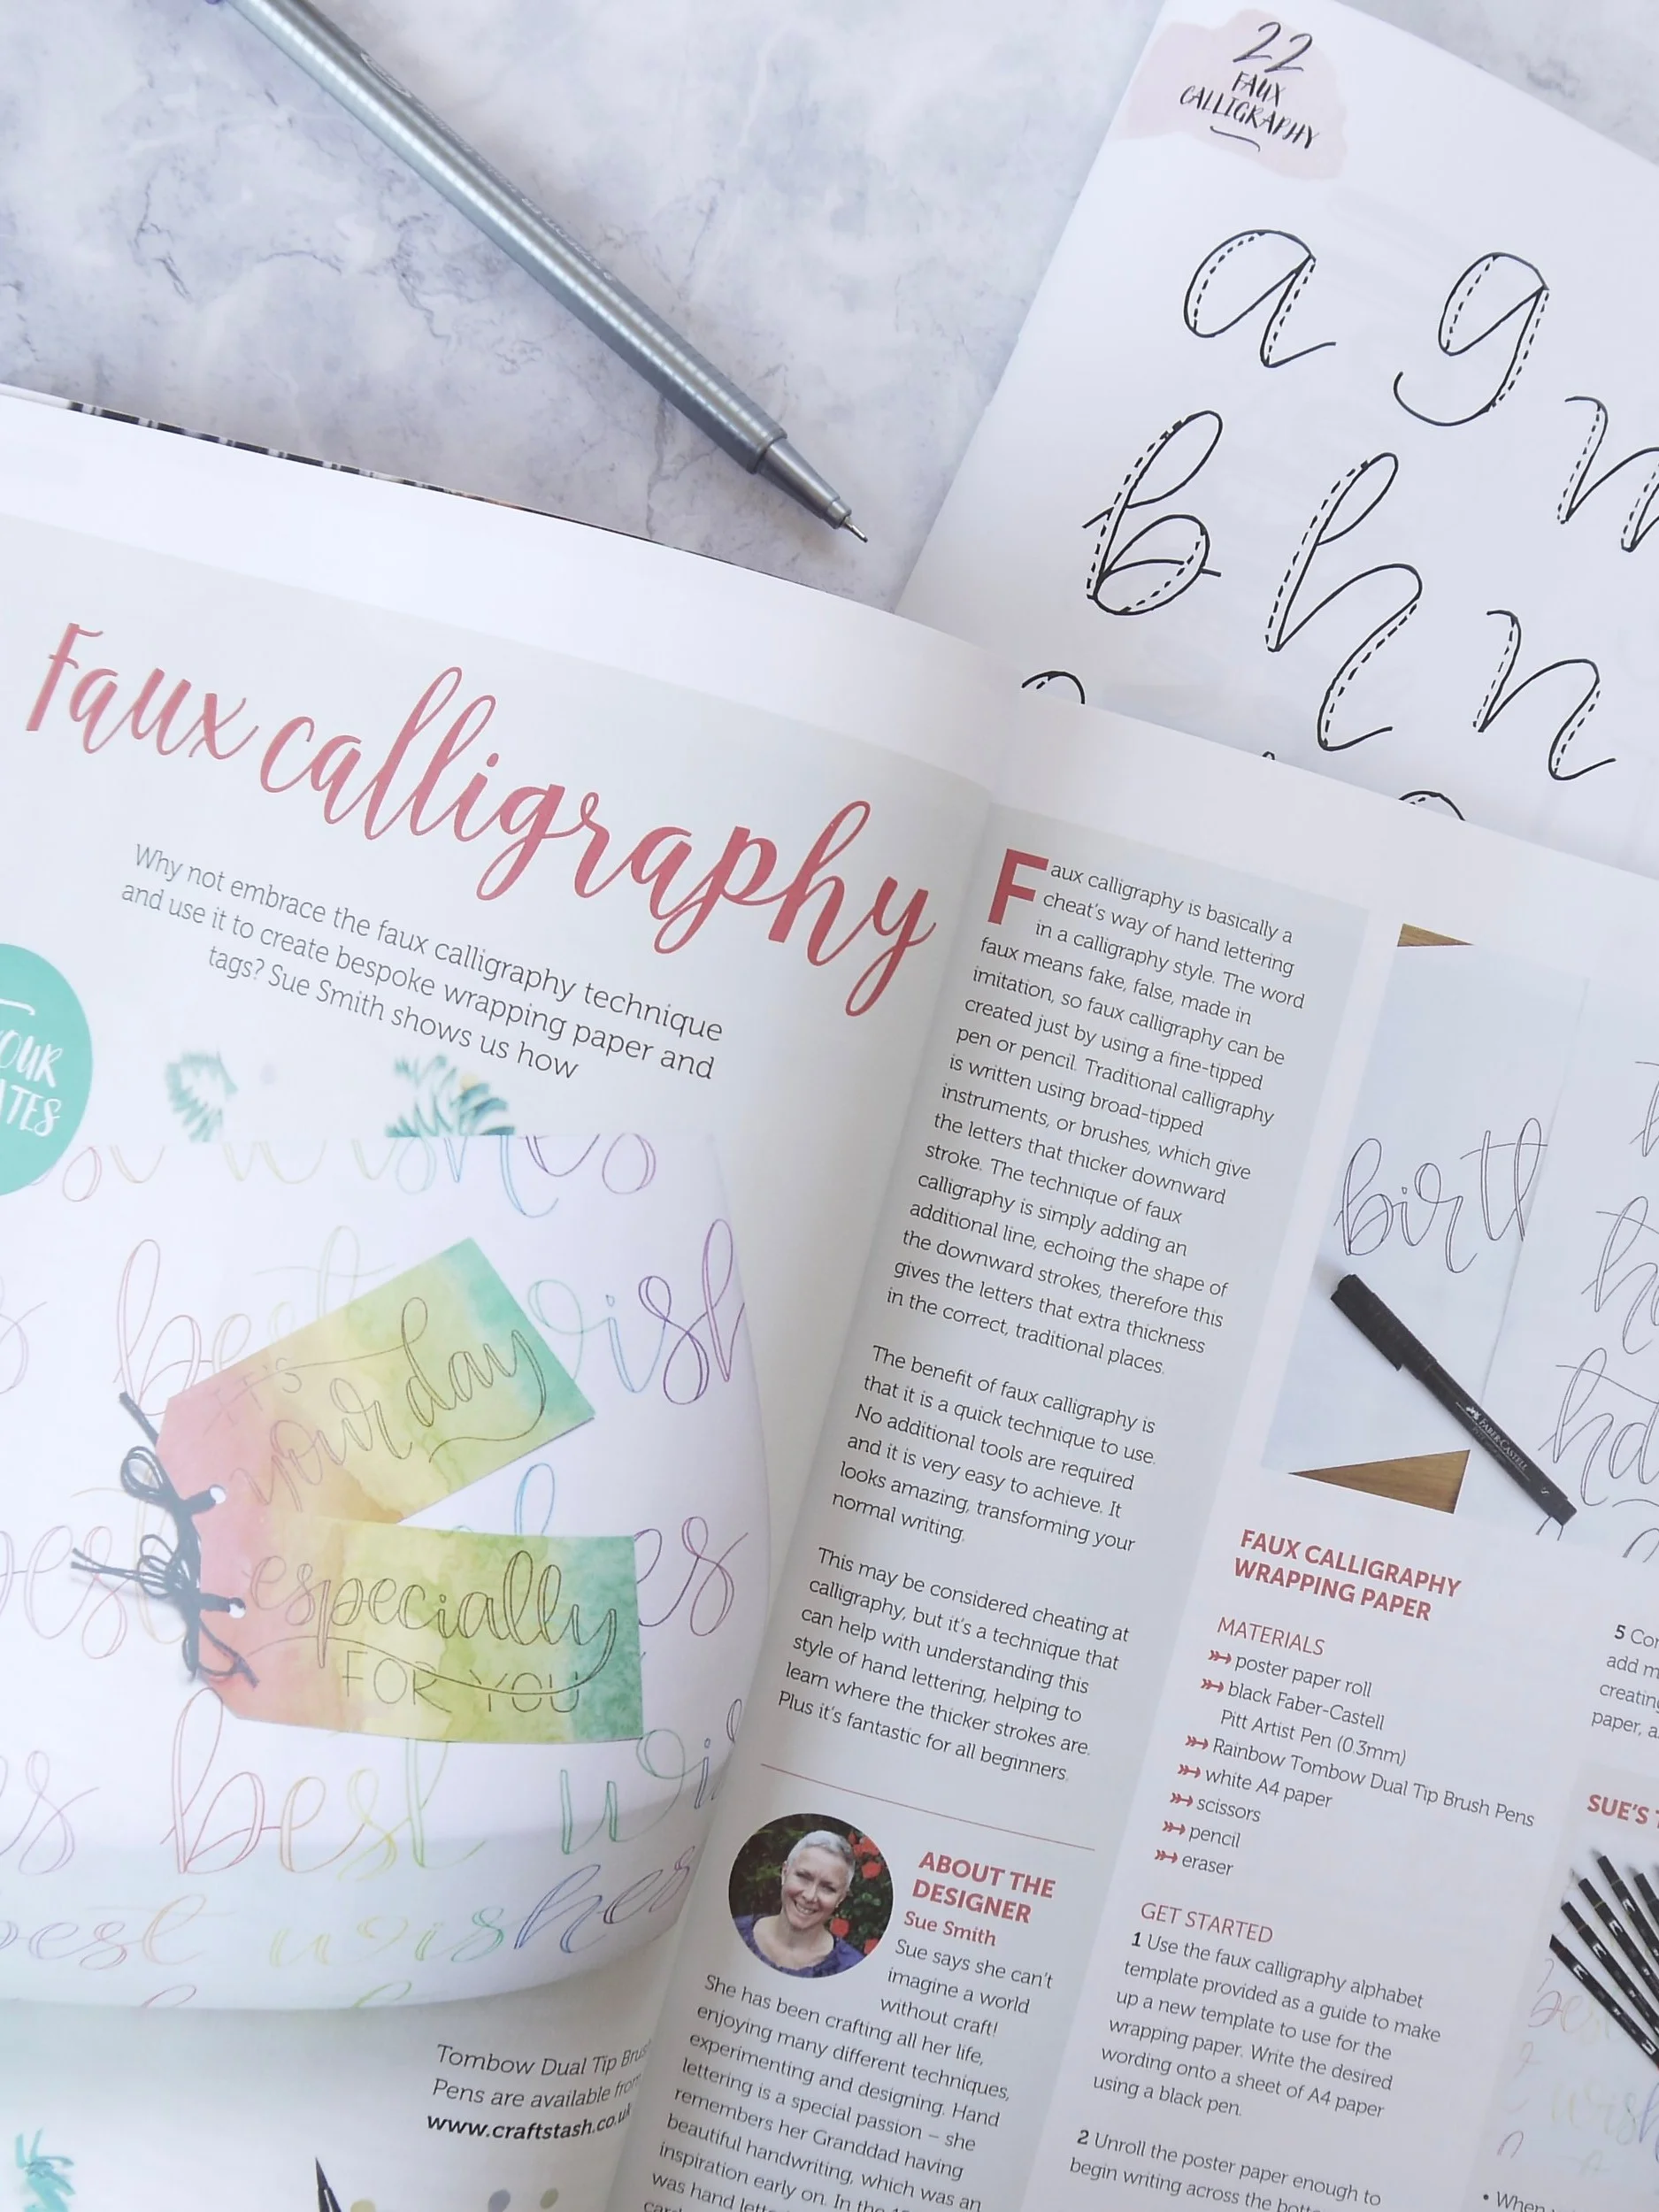
The faux calligraphy tutorial that I’m going to review is by designer Sue Smith. She gives a couple of projects which are right up my street - designing your own wrapping paper and gift tags - I told you so!
It comes with a really handy alphabet template in the pull-out section of the magazine which you can simply trace.
What I love about the template is how clear the letter formation is. The thick lines are just like writing a letter normally whilst the dashed lines thicken up the downstrokes.
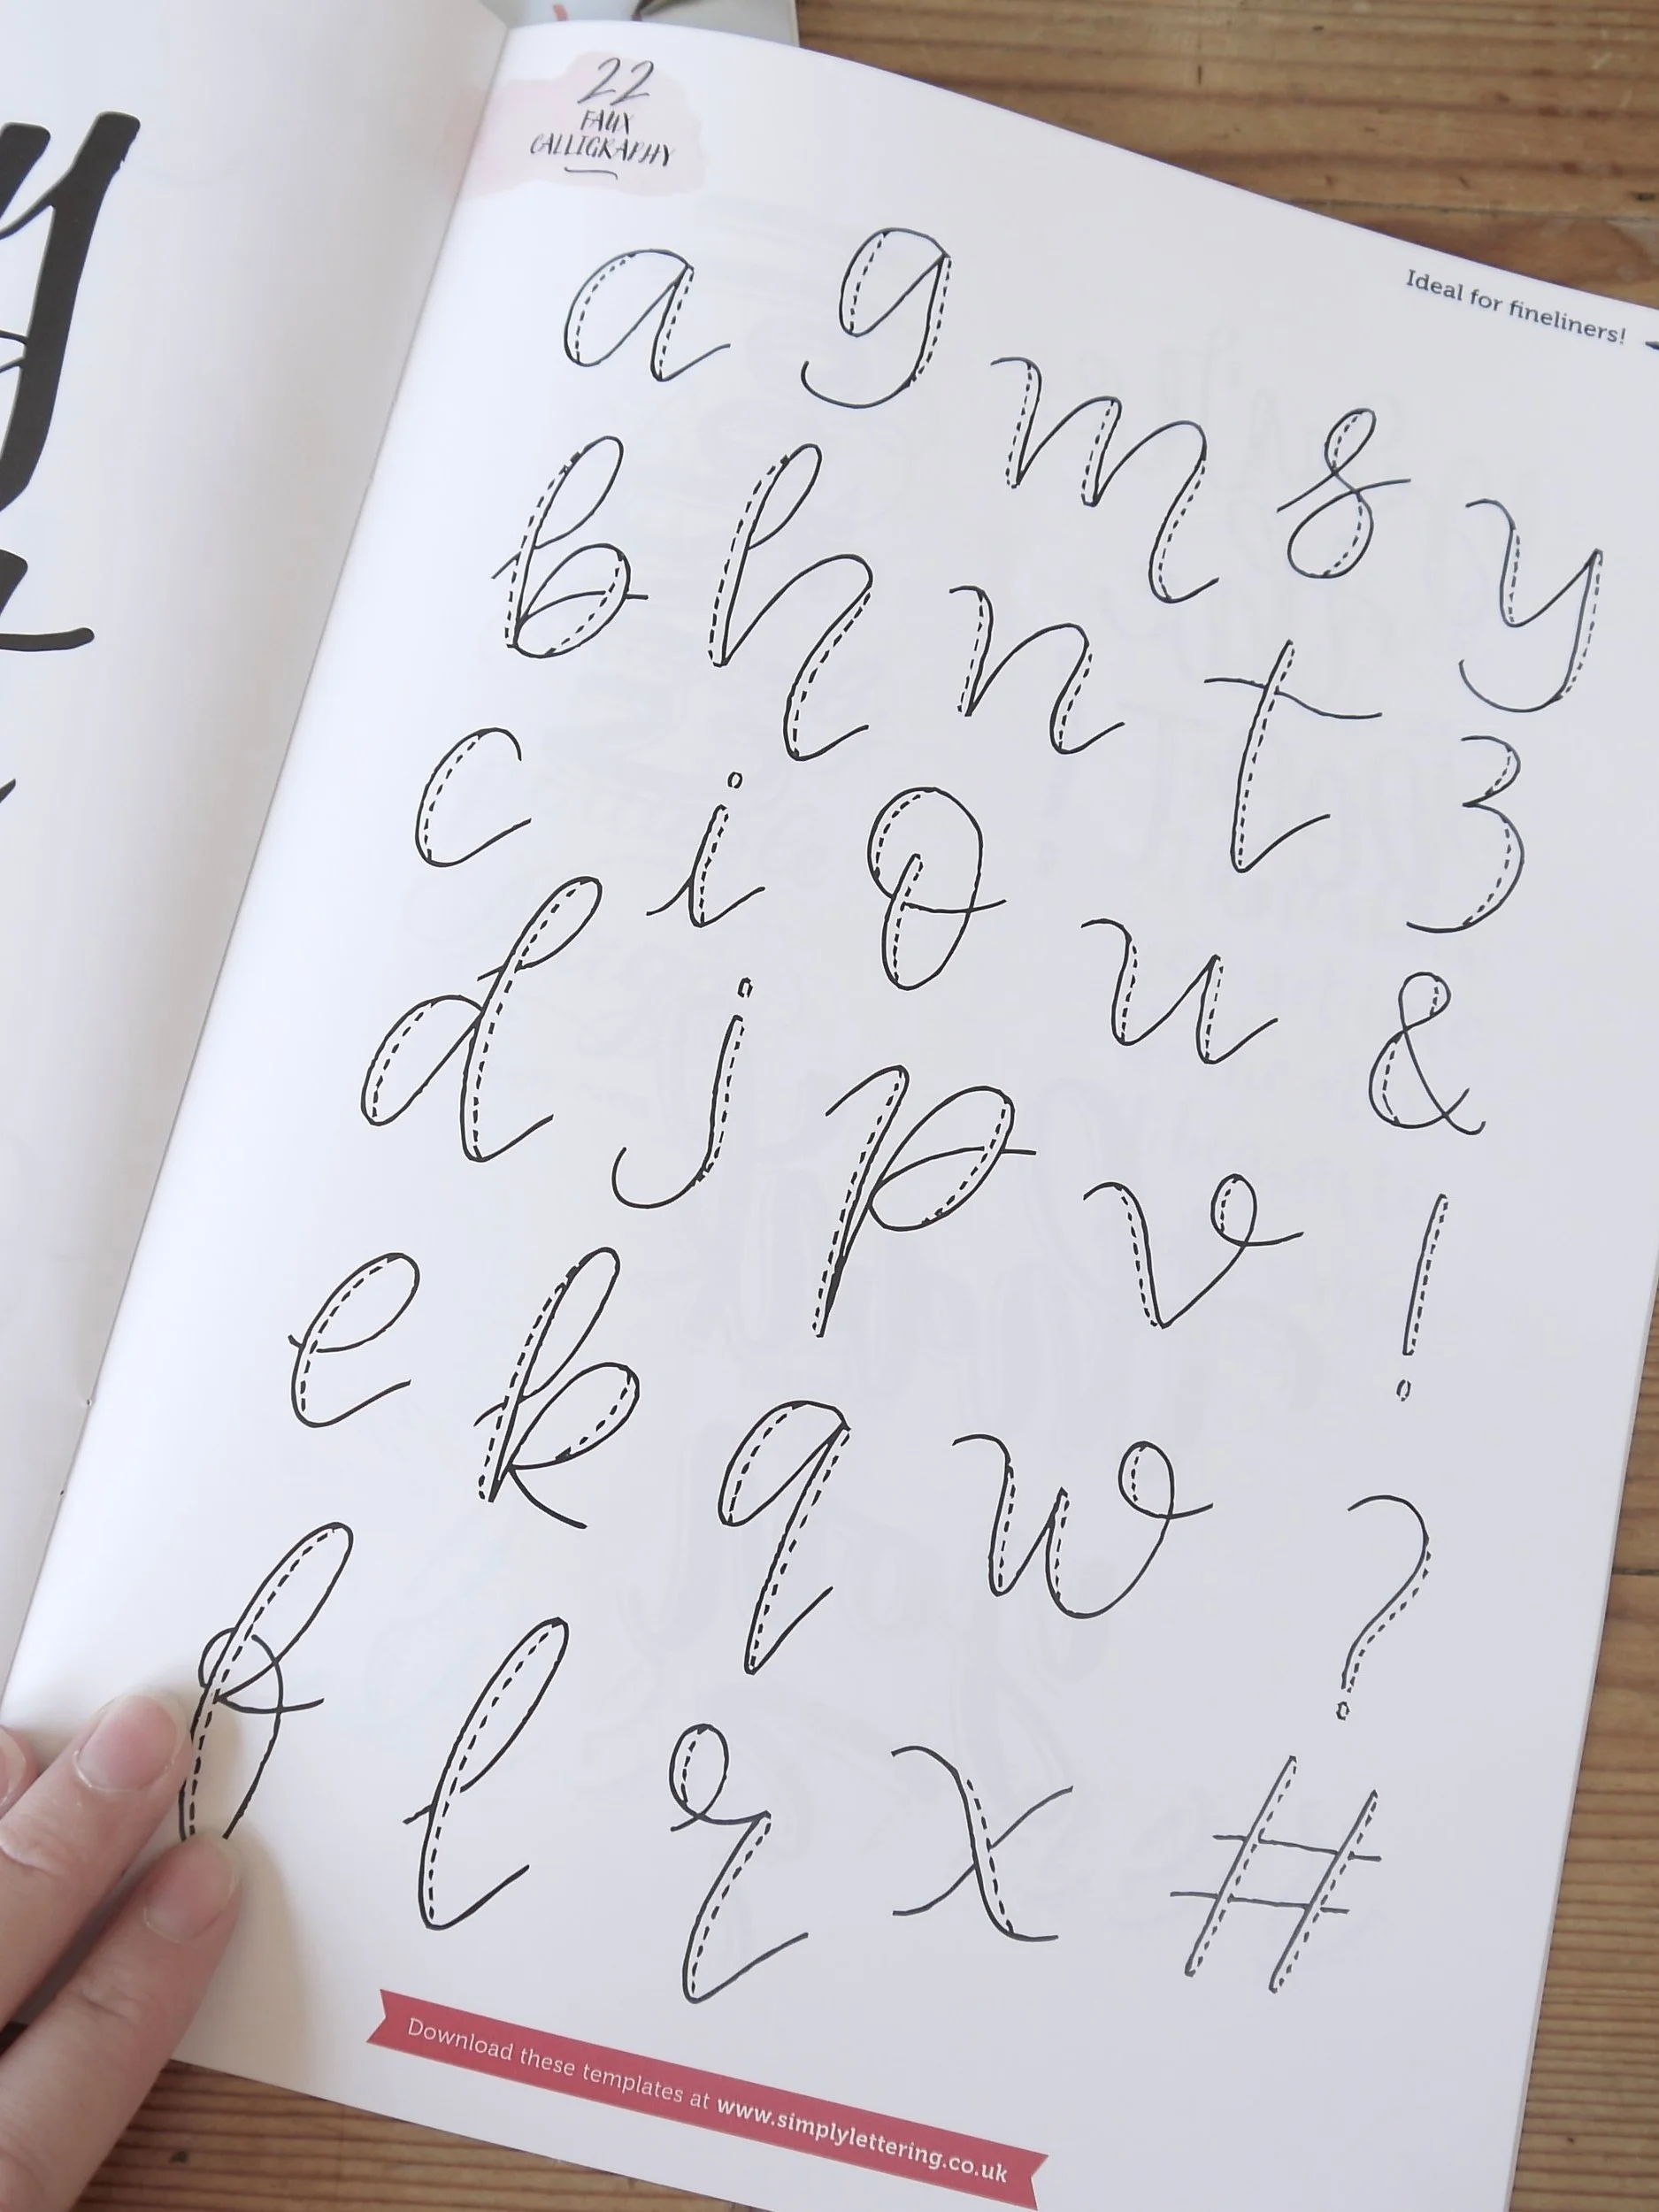
This faux calligraphy template amongst many others comes as a separate booklet with Simply Lettering magazine
What you need
Below is a list of materials that are suggested. I’ve added in brackets what I used instead:
• poster paper roll (A4 smooth copier paper HP Colour Choice)
• black Faber-Castell Pitt Artist Pen 0.33mm (Uni-ball Signo Silver Gel Pen)
• Rainbow Tombow Dual Tip Brush Pens (see below why these didn’t work for me)
• Scissors
• Pencil
• Eraser
• (I also used a ruler to mark out some guide lines)
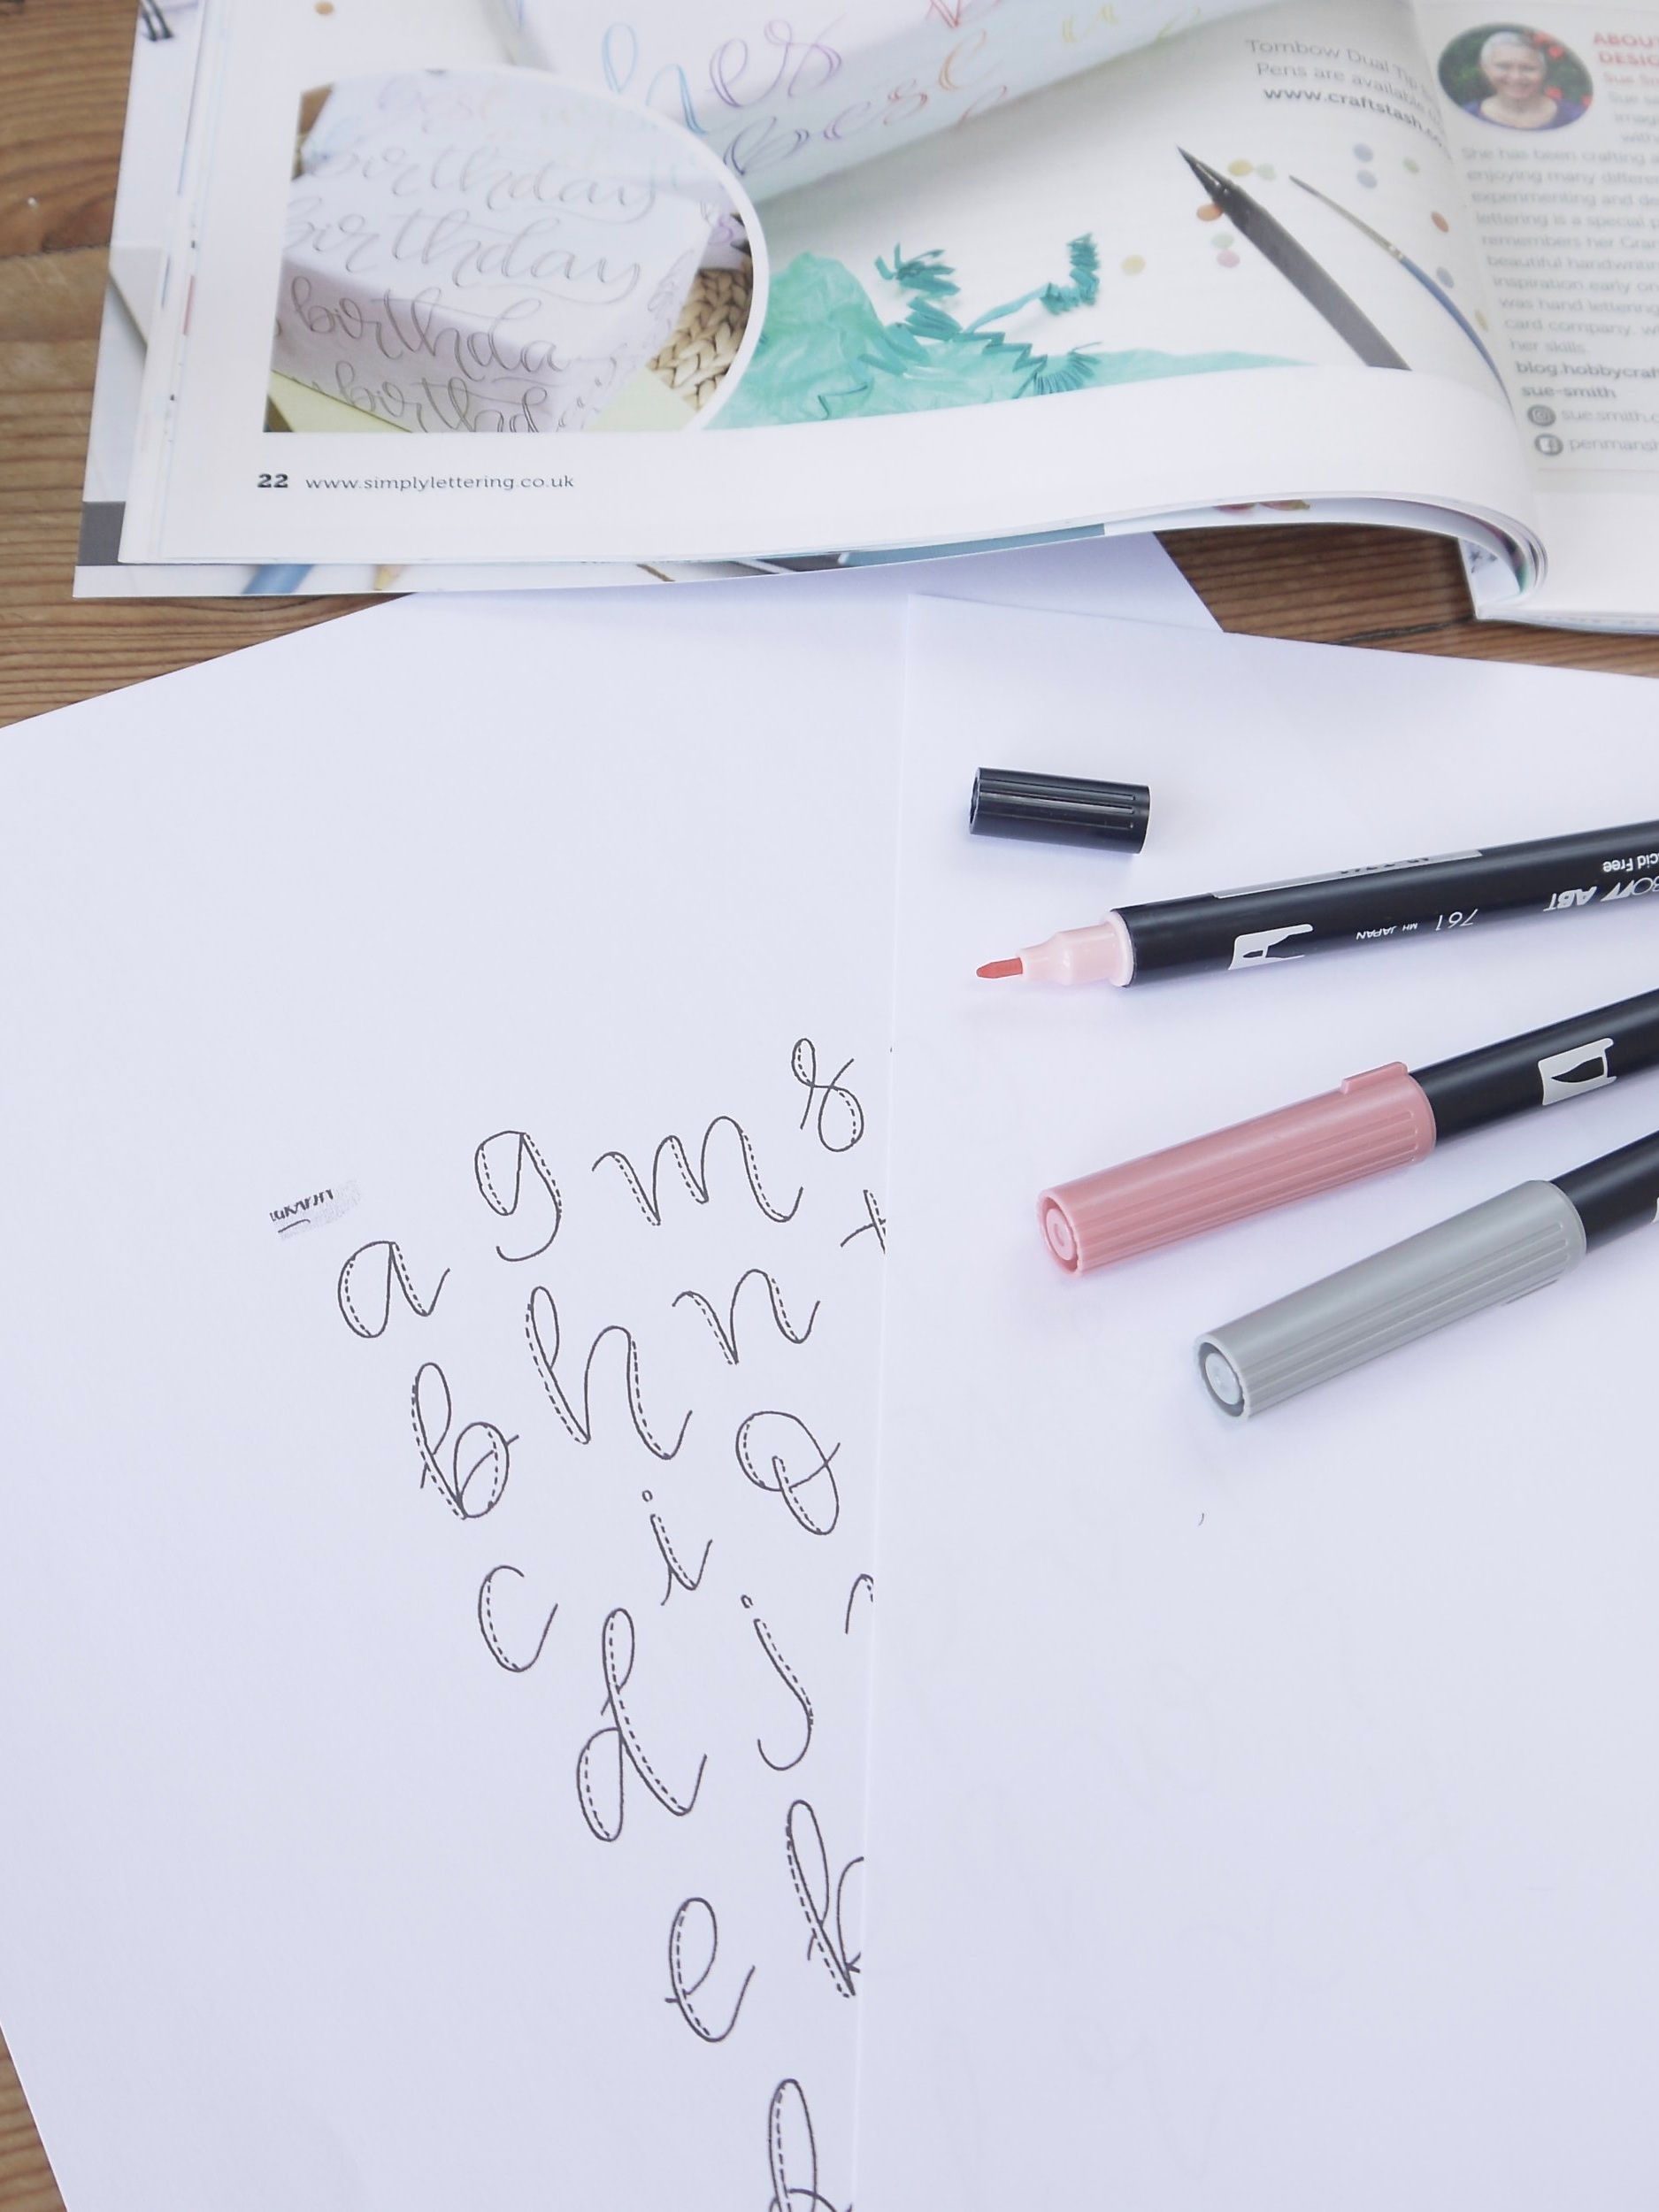
Materials needed for making faux calligraphy wrapping paper, plus a scaled-down version of the alphabet template.
To start with, I scanned in the alphabet template and printed it at a reduced scale of 55%. Because I was using A4 paper to create my wrapping paper I wanted to scale down the writing to a smaller size so that I could create enough of a repeating pattern.
You could even take a photo of the template if you don’t have a scanner, or use a document app and print from there.
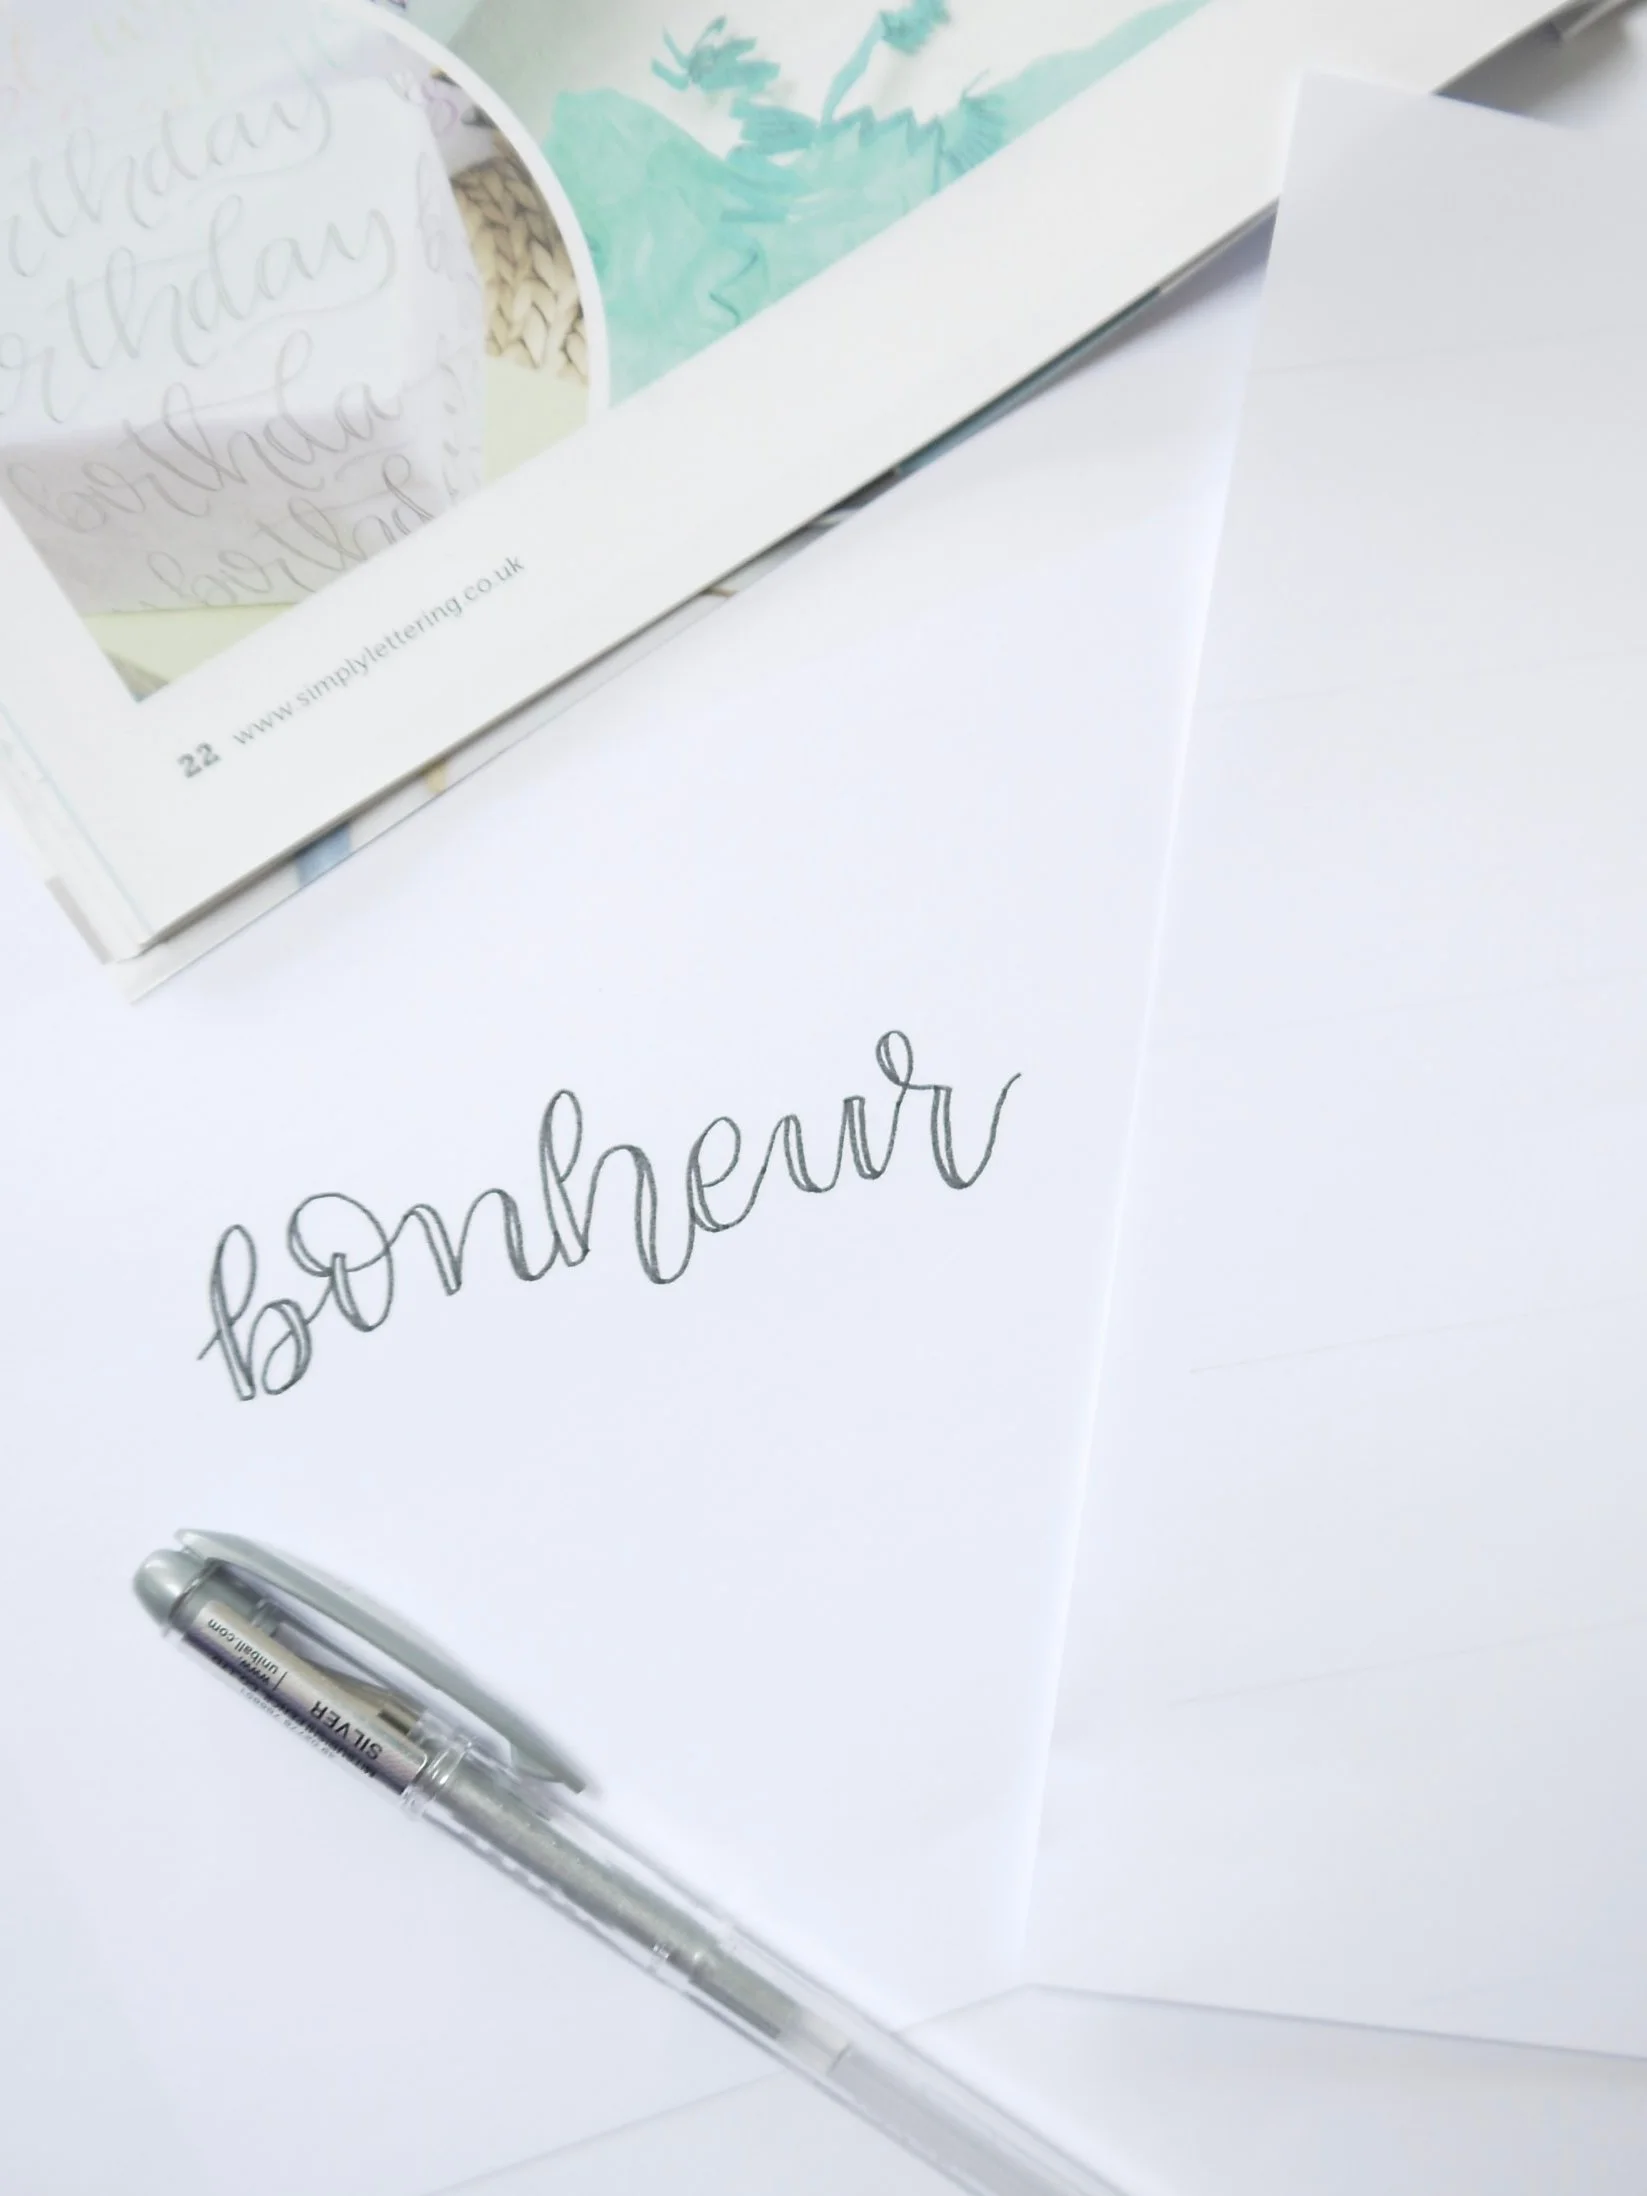
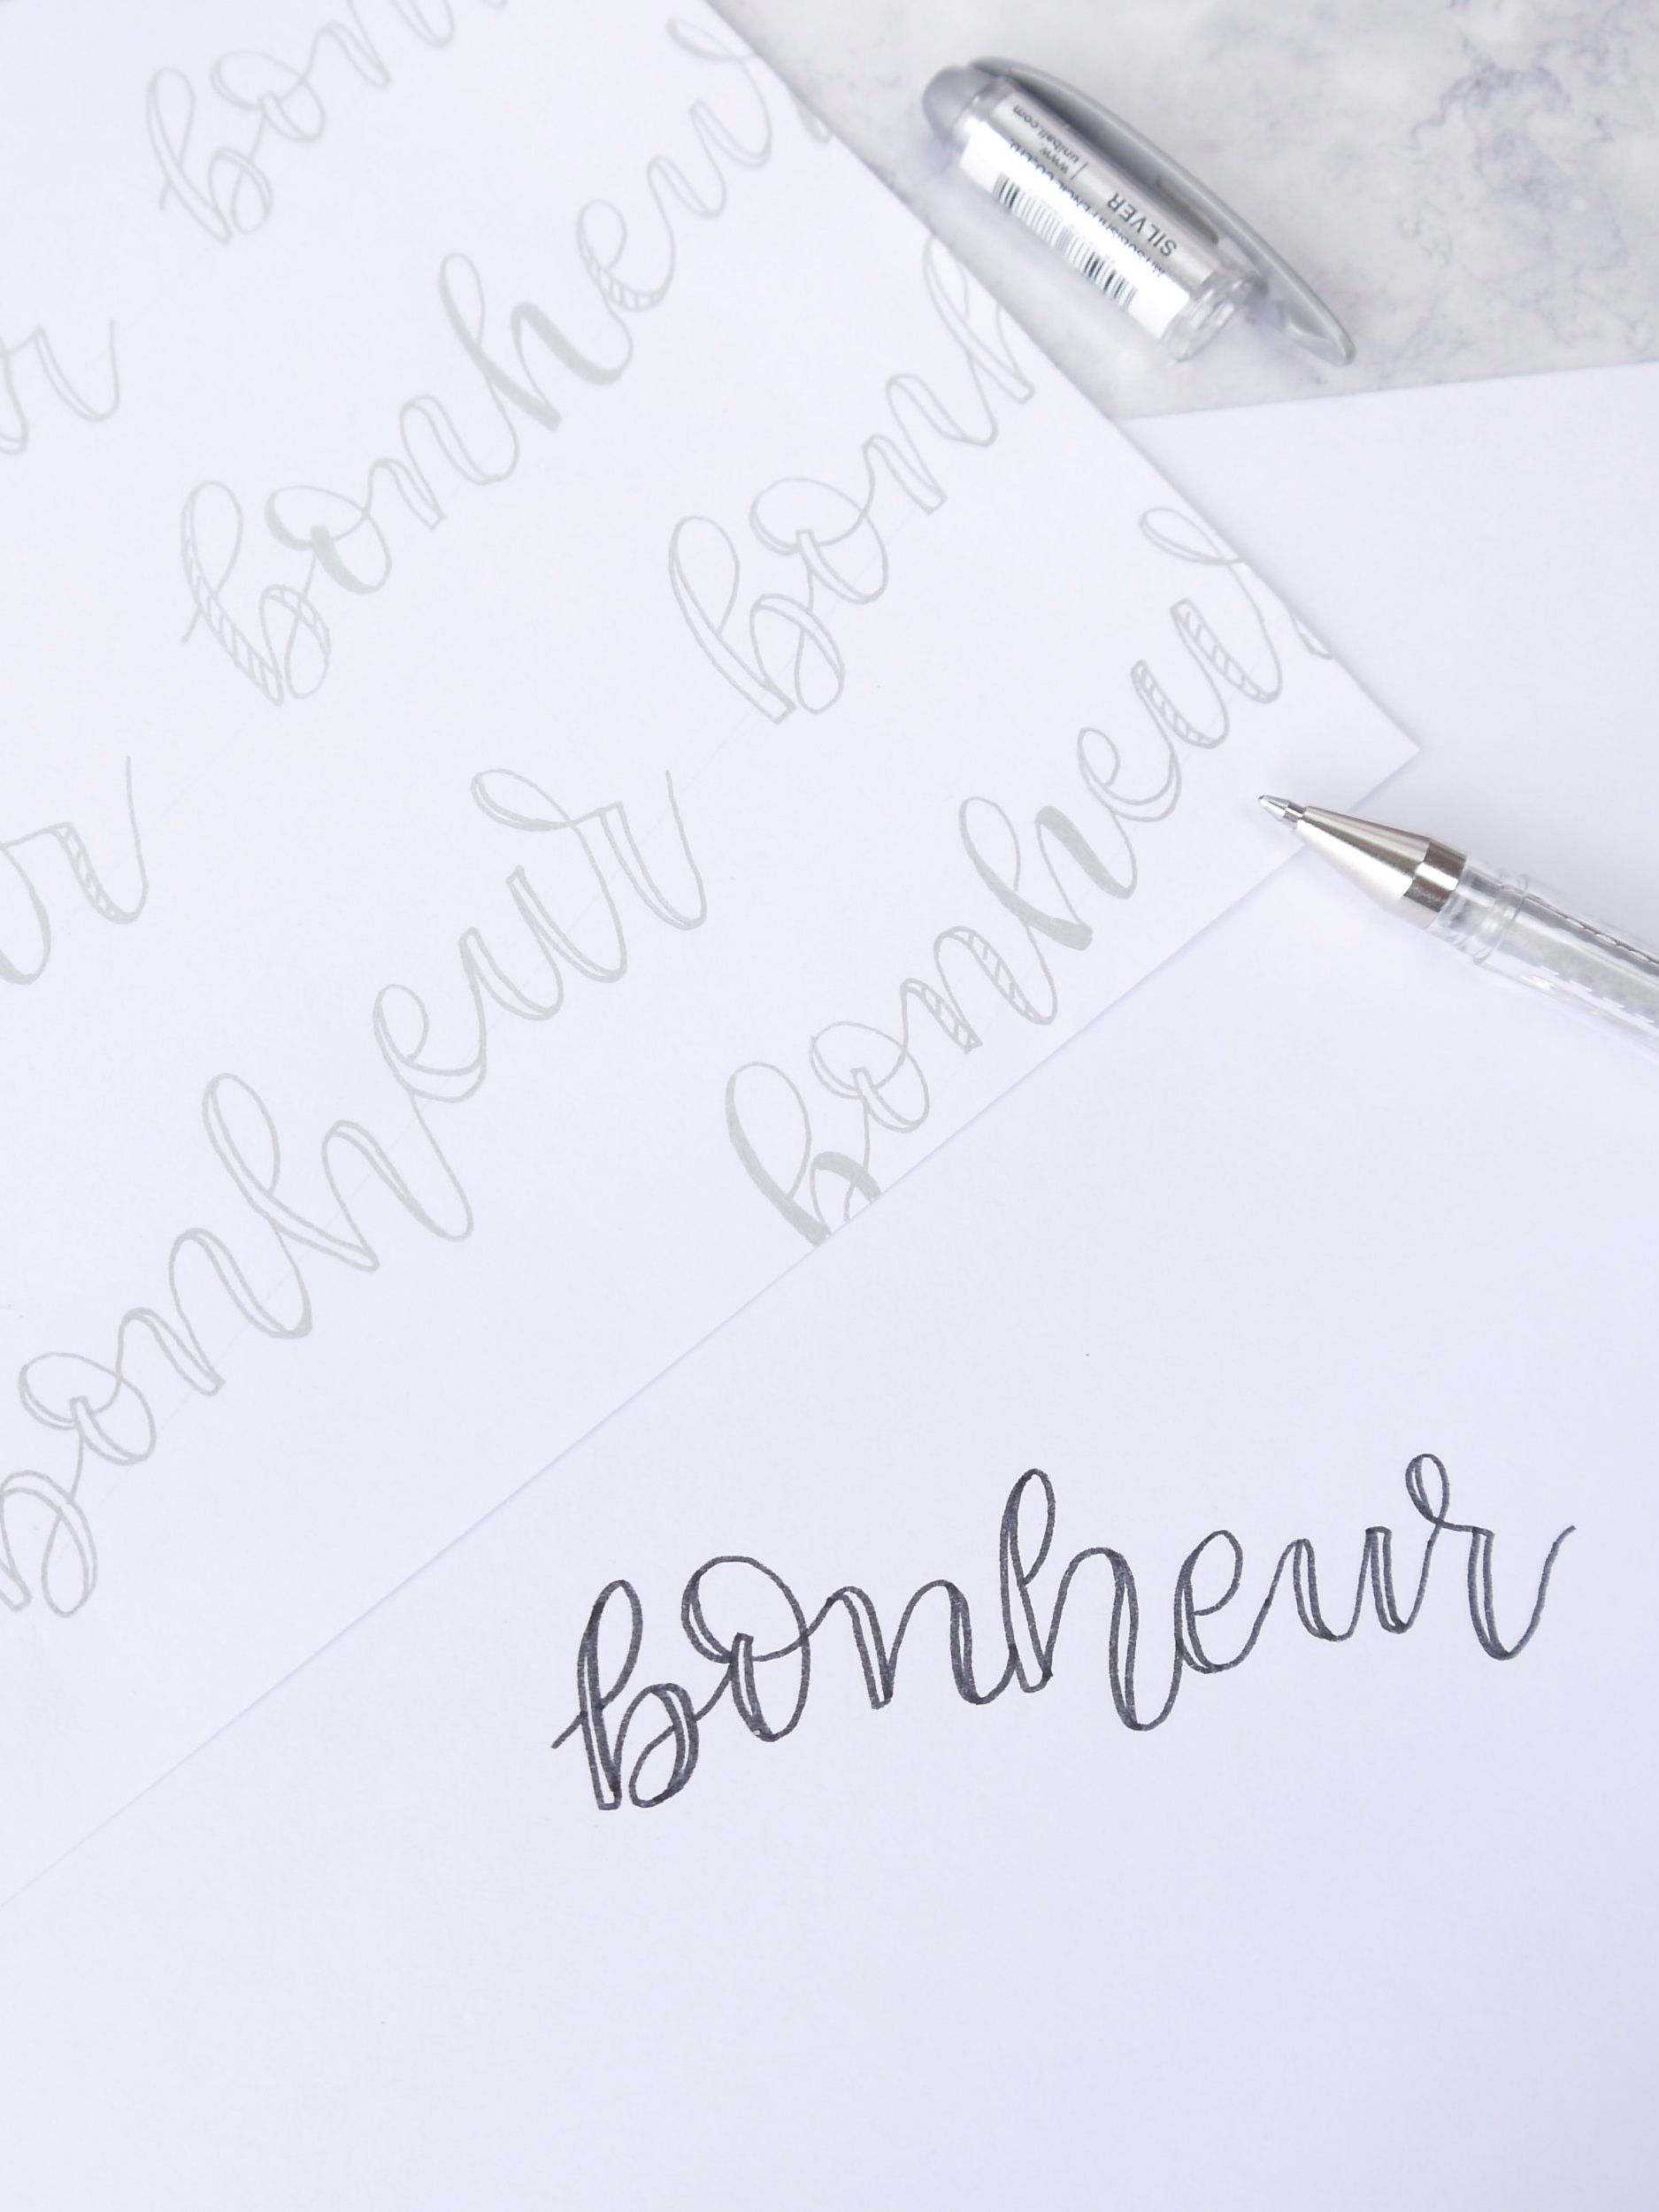
I then created an initial template of my chosen word ‘bonheur’ (‘happy’ in French) in black pen as suggested in the tutorial to be used again and again to trace over.
I couldn’t wait to get my stash of pens out and get started. The tutorial recommends using the bullet pointed end of the Tombow Dual Tip Brush Pens but I found that the result was quite messy.
The ink made dark blobs when it overlapped, and the same happened when I used fineliners.

Notice how the ink goes darker in places and looks quite blobby on copier paper - even though it’s smooth and works really well using a dip pen and ink.
I tried using the same pens on the reverse of some layout paper and the result was much better. Using the right paper can make all the difference, so it’s worth doing some testing out first.
The smooth, almost resistant surface of the paper allowed the ink to be moved around before being absorbed. I found that lifting the pen gradually at the end of each stroke didn’t leave such an inky deposit too.
The only problem with using layout paper for wrapping paper is that it’s quite transparent.

The finish on layout paper is much smoother but you’ll need to lift the pen at the end of each stroke otherwise you’ll get dark dots which you can see on grey and last pink lettering.
In the end I settled on using a silver gel pen as the gel stays fluid before drying, allowing you to blend in each stroke giving it an even finish.
Here I added my own step of drawing some light guidelines in pencil to write on as I couldn’t trust myself to keep straight! I went for a bit of a diagonal slant which I though would be good at hiding any errors ;)
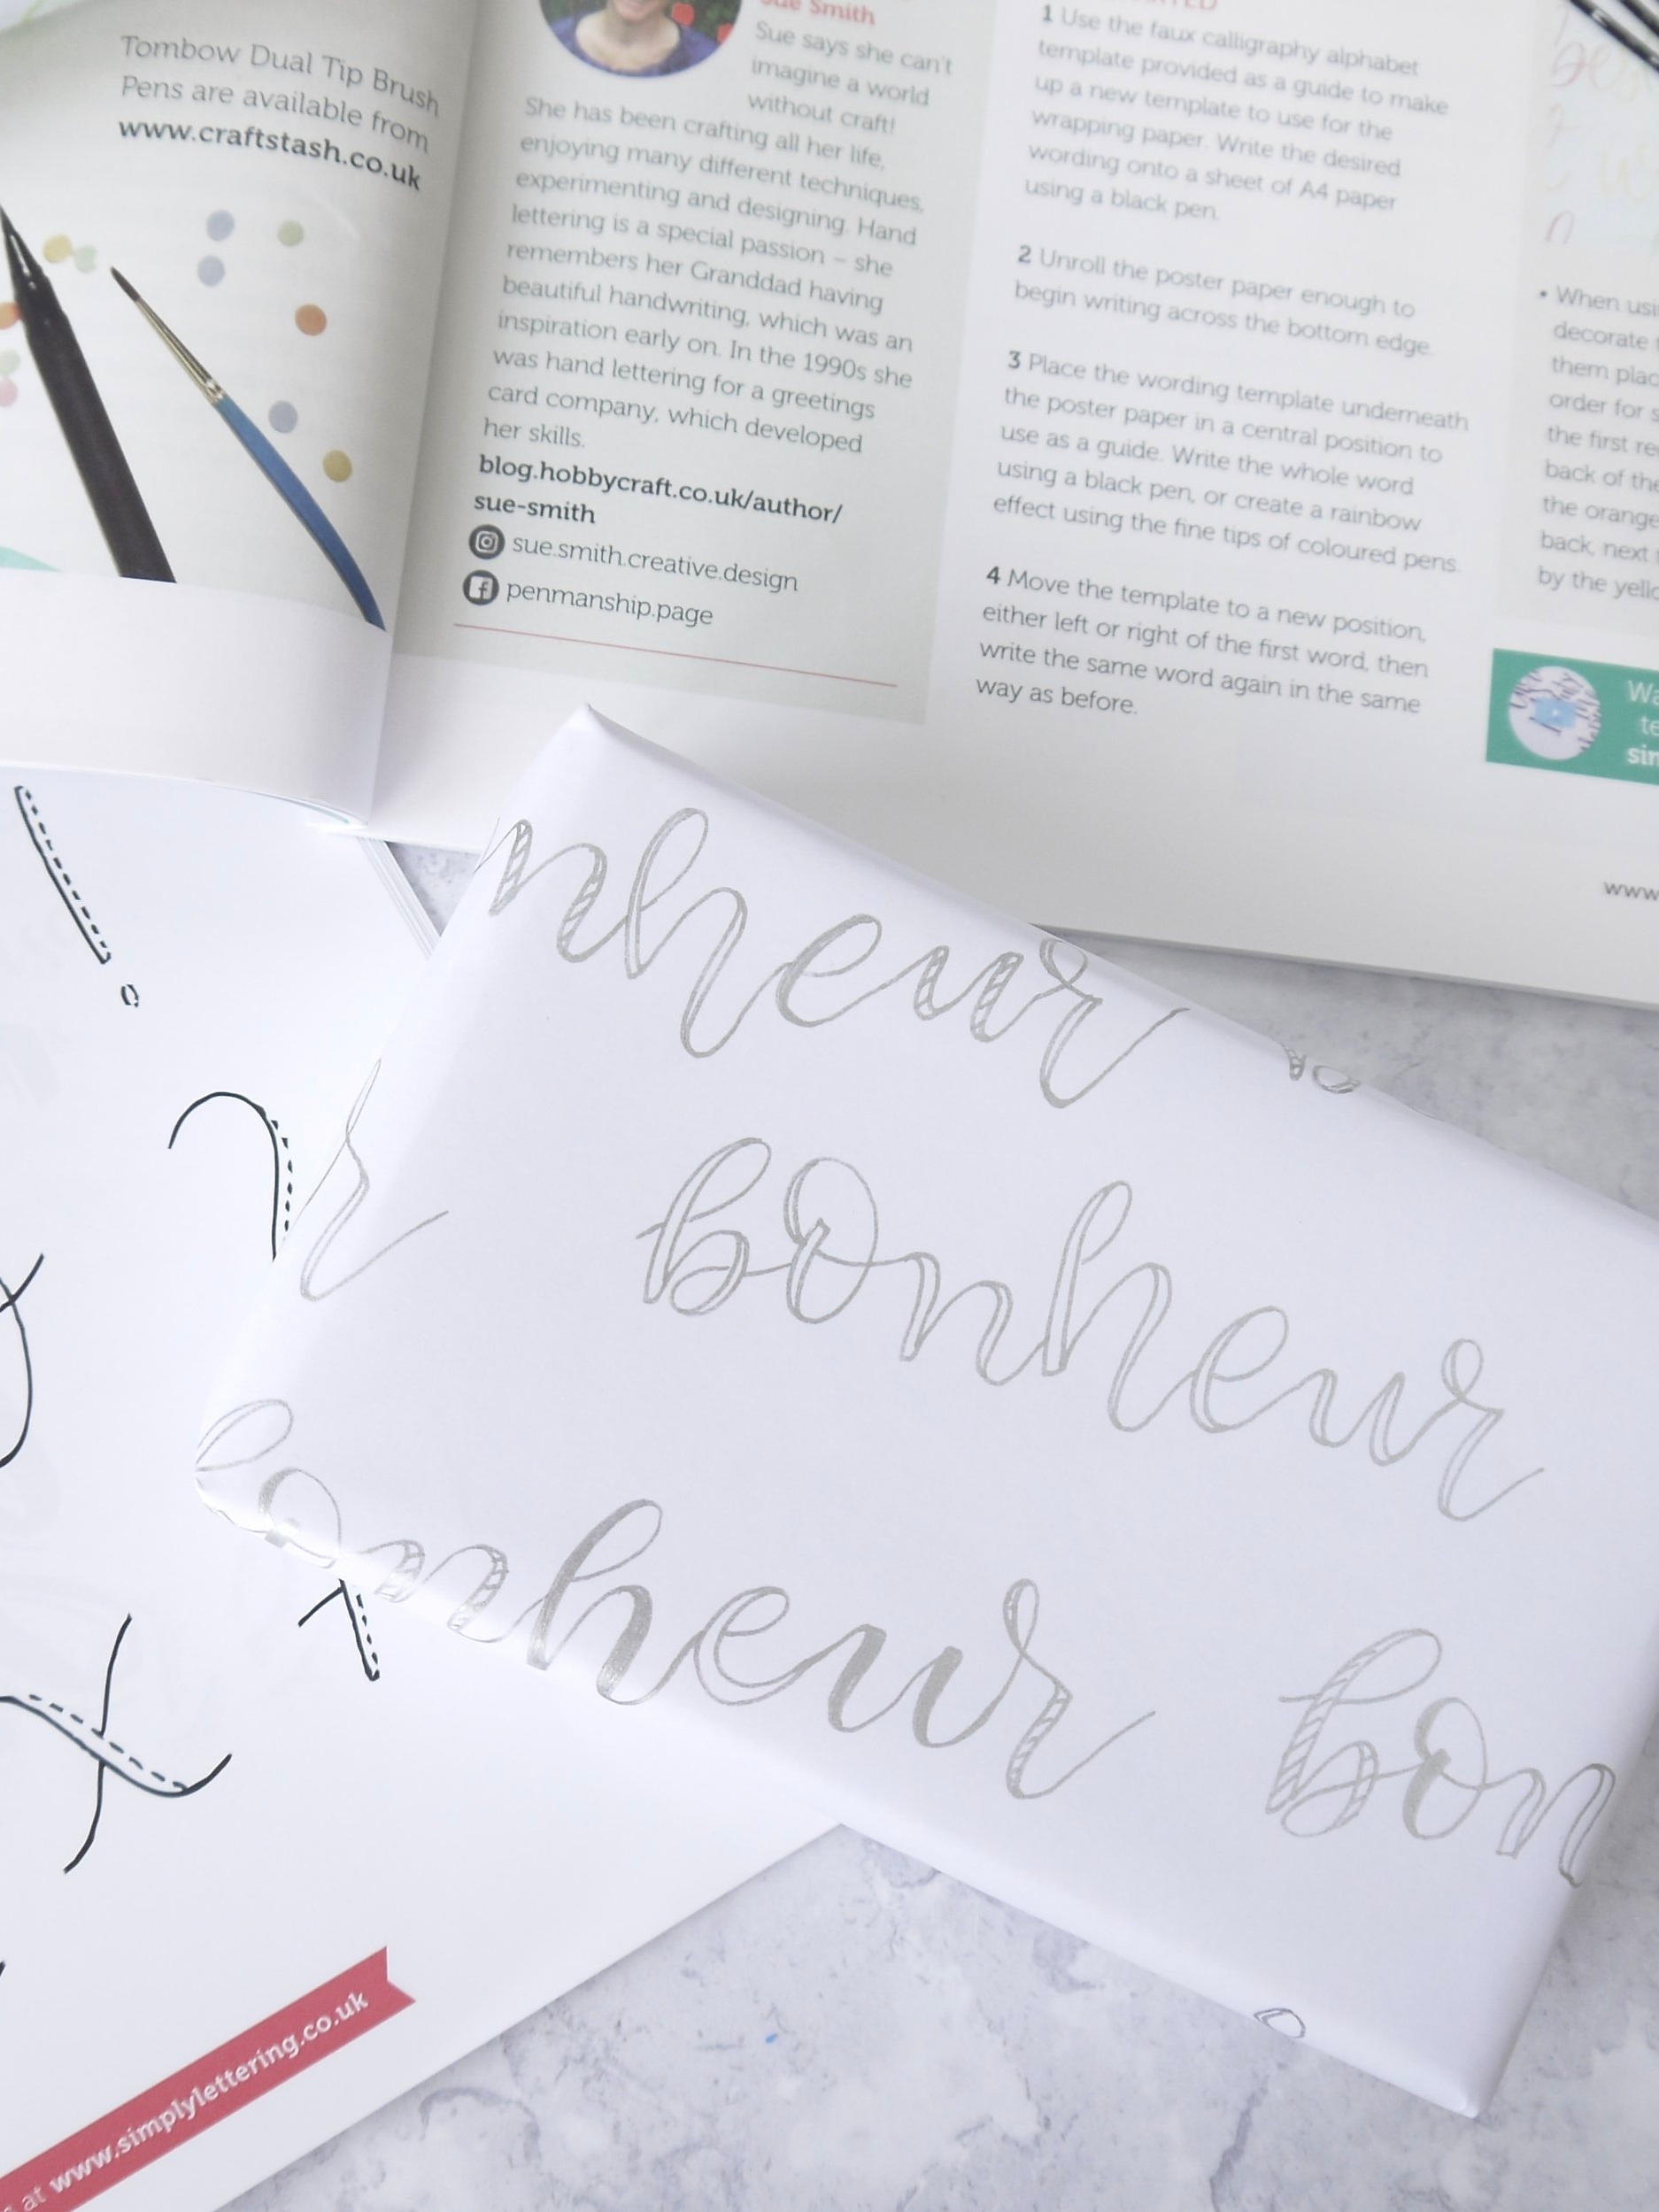
I then went about tracing my word and moving the template to a new position and repeating the process until my page was filled.
You can join some or all of the lettering, it’s up to you, and feel free to add some ‘bounce’ by not sitting every letter on a straight base line, giving it that modern calligraphy look.
I used the same template and moved it under my soon-to-be wrapping paper and simply traced with a gel pen, decorating some of the letters too.
The finished wrapping paper…
I’m quite pleased with it if I say so myself, even though I could’ve done with slowing down - something that I’m always urging my students to do at my calligraphy classes! Easier said than done.
It just goes to show that this is a really achievable project and a great way in for hand lettering beginners.
There are so many variations to this fun project. You could try different colour papers - Kraft paper would look great or play around with ink colours and even add your own patterns and doodles.
Not only is it a great way to wind down and do something creative, but you can add your own personal touch to your gifts which are also eco-friendly and bio-degradable.
And I couldn’t leave without making a gift tag in my own lettering style too…

Are you feeling inspired yet?
If you need to spend a bit more of your time switching off and slowing down then I’d urge you to give this faux calligraphy tutorial a go.
Better still, enter my competition to WIN a copy of the magazine for yourself!
Remember, if you leave a comment below you’re entitled to an additional entry so tell me what you’re planning on using faux calligraphy for!

TERMS AND CONDITIONS
Entries to the giveaway must be submitted by 11:59pm GMT Saturday 27th July 2019. Submissions after this date and time will not be counted. Submissions will only be accepted if they adhere to the guidelines as set out above. The competition is open worldwide. Over 18’s only. Two winners will be selected at random and announced on Sunday 28th July on the original giveaway Instagram post. The winners will have to contact me via Instagram direct messaging or email to claim their prize. The winners will receive a copy of Simply Lettering magazine. A cash alternative is not available. This giveaway it is not sponsored or endorsed by Instagram.